Picture Gallery and Slideshow solution for WordPress

You want to be able to create slideshows and lists of pictures within a post on a WordPress site?  There are many solutions available.  One of them that meets my needs is the NextGEN Gallery WordPress plugin.

Features
  • Templates : You can add custom templates for your theme.
  • Media RSS feed : Add the Cooliris Effect to your gallery
  • Role settings : Each gallery has a author
  • AJAX based thumbnail generator : No more server limitation during the batch process
  • Copy/Move : Copy or move images between galleries
  • Sortable Albums : Create your own sets of images
  • Upload or pictures via a zip-file (Not in Safe-mode)
  • Watermark function : You can add a watermark image or text
  • JavaScript Effect : Use any available popular image effect : Shutter, Thickbox, Lightbox or Highslide
  • Multiple CSS Stylesheet : Use a nice shadow effect for your thumbnails with your own CSS file
  • Slideshow : Full integrated slideshow as jQuery or Flash solution
  • TinyMCE : Button integration for easy adding the gallery tags
  • Sidebar Widget : Show a slideshow, random or recent picture at your sidebar
  • Language support : Translated in more than 30 languages
  • Translation downloader : Download with one click the new translation file
  • Upload tab integration : You have access to all pictures via the upload tab
  • Tag support for images : Append related images to your post, create a image tag-cloud
  • Meta data support : Import EXIF, IPTC or XMP meta data
  • Sort images feature
  • Support for XML Sitemaps : Add Images to your sitemaps with the WordPress SEO by Yoast plugin

How to Install

1) Log into your WordPress dashboard. 

2) Go to Plugins->Add New

image

3) Type “NextGen Gallery” into the search box and click “Search Plugins”

image

4) “NextGen Gallery” by Alex Rabe should be the first item.  The search results may change, so make sure you are installing the right thing. 

image

5) Click on “Install Now” and click “OK” on the confirmation screen:

image

6) Click “Activate Plugin”

image

7) Now the NextGen Gallery WordPress plugin should be installed, activated, and ready to go…

image


How to Use

There are many ways to use this plugin.  I’m going to show you how I created a gallery and used a short code to insert it into a post.

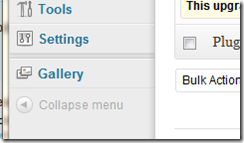
1) Go to the new “Gallery” section on your wordpress menu:

image

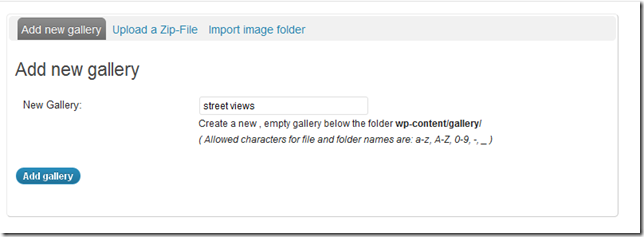
2) Click Add Gallery/Images

3) Give the Gallery a name.  (For this example, I have 9 pictures of street views that I have taken.  So I am calling it “street views”)

image

4) Click “Add Gallery”

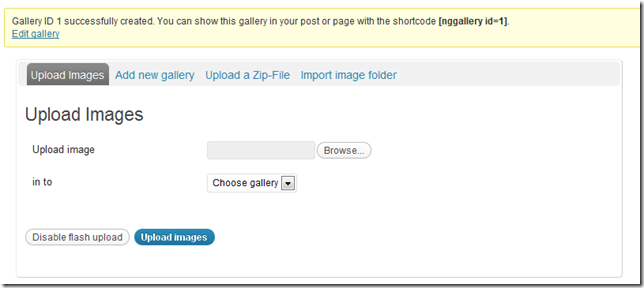
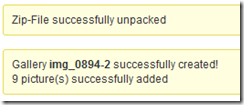
5) Now it is time to upload the pictures.  You can choose to upload pictures individually, or you can zip them up and upload one zip file.  There are several options available here, and I recommend exploring them all.  For this example, I am going to use the Upload a Zip-File. 

image

image

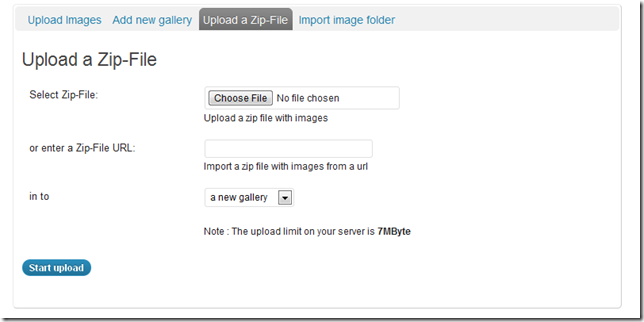
6) Click on “Upload a Zip-File”.  Click “choose file” and then click start Upload.

image

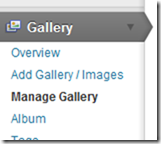
7) Now let’s view the Gallery.  Click on Manage Gallery. And Click on Street views

image

image

8) Here you can see all the pictures in the gallery.  Make adjustments such as rotating, caption, name, tags, exclude pictures, sort, etc.

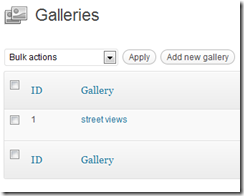
9) Now let us insert this gallery into the post.  For this, we need to know the Gallery Id.  Which we can see in the list of Galleries.  This one is ID 1.  Type the short code below to insert this gallery.

image

Here is the results:

[nggallery id=1]

There are many, many more features that I did not cover.  But this makes it very simple to add photoslide shows any place you want on your wordpress site.

If there are favorite features you use of this plugin, please leave a comment.  Also, if there are other plugins that you would recommend then leave a comment about that as well.
WP Plugin: Contact Form 7

wordpress.org/extend/plugins/contact-form-7/

Installation:

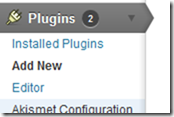
Step 1:  Dashboard->Plugins->Add New

image

Step 2: Search for “Contact Form 7”.  Should be the first result

image

Step 3: Click “Install Now” and click “OK” in the dialog confirming this choice:

image

Step 4:  Click “Activate Plugin”

image


Configuration

Step 1: Click on the newly added “Contact” area on the left navigation bar:

image

Here you can create a form to be displayed on your site.  It provides a default form that will be useful in 99% of the time.  

At the top it has the code that you need to put on the page or post that you want the contact form to appear.  Just copy and paste this code:

image

Now go to the page that you want to add the contact form.  I have created a page with the title “Contact Us” for this purpose.

image

image

image

Now just paste the code from the contact form here:

image

Click the “Update” button and then view the form on your site:

image

When you fill it out and submit it, it will be sent to the email address listed in the “contact” settings page where we had copied the code from.

image

After clicking send a little message appears:

image

And sure enough, an email appears in my inbox:

image

Customization

My first use for this contact form is for a home inspector.  What are some things that a home inspector would like to know?  How about phone number and address of the home to be inspected.  Also, it doesn’t make sense to have the customer put a subject, so we will remove this.

Go back to your admin screen and go to Contact:

image

Look for the place where the form is defined:

image

The first step is to remove the “Subject”:

<p>Subject<br />
    [text your-subject] </p>


Should look like this now:

image

Let’s go ahead and add a place for phone number just below email address:

Step 1:  Click on the blank line above the “Your Message” line.

Step 2:  Click on the “Generate Tag” button on the right and select “Text field” on the list that is displayed:

image

Step 3: Fill out the attributes of this new field.  It starts out with some default values like this:

image

Let’s make these changes:

Required Field: <checked>

Name: Phone-Number

Once you make these changes, it will look like this:

image

Now, copy and paste the codes indicated to the right places, and add some formatting codes.  I would make the top part look like this:

image

And make the bottom look like this:

image

Now let’s add the property address and not make it a required field.  This can be done by change the form code to look like this:

image

Change the email part to look like this:

image

Scroll back up to the top and click “save”

Go to the front of the site and see the results:

image

Give it a test:

image

Worked as expected:

image

TinyMCE Advance WordPress Plugin

Did you ever want to make changes to the editor window in WordPress?  Then the TinyMCE Advance WordPress Plugin is for you!

When you first start WordPress, the editor window provides very minimal options:

image

(The “ABC” with the checkmark was added by the After The Deadline plugin which provides proofreading support.  And the last item was added by the WP-Tables Reloaded Plugin)

Clicking on the expand icon:

image

will reveal another row of options:

image

The TinyMCE Advance WordPress Plugin will add an option under “settings” for “TinyMCE Advanced”.  This will allow for you to completely alter this and to add many, many more options:

image

I’ve added the Table set of functions.  I found that it did not work when I had WP-Table Reloaded installed.  But when I deactivated WP-Table Reloaded it worked fine.

image


And now when I enter a new post here are the options I have:

image

WP-Plugin: Slick Social Share Buttons [Recommended]

The Slick Social Share Buttons is my recommended solution for adding the “Tweet”, “Like”, +1, stubleupon, digg, InShare, and Google Buzz links to your WordPress site.  I installed it on ISpeakHindi.com, and had it looking good with my theme in less than 3 minutes.  Here is how it looks in it initial state:

This is the activated state:

Slick isn’t it?

There are many different options on where to put it.  By default it floats as a “share” button in the upper right of the screen.  I changed the type from “floating” to “Slide out”.  The Location to “Left”.  And increased the offset to 200px.

You can also control where on your WordPress site it shows up.  For me, I think it only makes sense to show it on “posts” since I want to encourage sharing of individual lessons to get some deep links into my site propagated into the social spheres.  But you can also have it for the “home page”, pages, “category pages” and “archive pages”.  You also have control on which social services to show and options on how they are displayed.

I initially had trouble with the “Facebook Like” button.  I would click it, the number of “likes” would increment, the facebook like comment box would display.  And within a second, the box would disappear and the number of likes went back to zero.  I found that when I changed the “Facebook” option from “xfbml” to “iFrame” I no longer had this problem.

Convinced?  Log into your WordPress dashboard.  Go to Plugins->Add New.  Then search for “Slick Social Buttons”.  It should be the first one that comes up.  If you get multiple results look for the one by Lee Chestnutt..

You use a different social share plugin for WordPress?  Leave me a comment that includes the name of the plugin, the site you use it on, and why you like it.