Picture Gallery and Slideshow solution for WordPress

You want to be able to create slideshows and lists of pictures within a post on a WordPress site?  There are many solutions available.  One of them that meets my needs is the NextGEN Gallery WordPress plugin.

Features
  • Templates : You can add custom templates for your theme.
  • Media RSS feed : Add the Cooliris Effect to your gallery
  • Role settings : Each gallery has a author
  • AJAX based thumbnail generator : No more server limitation during the batch process
  • Copy/Move : Copy or move images between galleries
  • Sortable Albums : Create your own sets of images
  • Upload or pictures via a zip-file (Not in Safe-mode)
  • Watermark function : You can add a watermark image or text
  • JavaScript Effect : Use any available popular image effect : Shutter, Thickbox, Lightbox or Highslide
  • Multiple CSS Stylesheet : Use a nice shadow effect for your thumbnails with your own CSS file
  • Slideshow : Full integrated slideshow as jQuery or Flash solution
  • TinyMCE : Button integration for easy adding the gallery tags
  • Sidebar Widget : Show a slideshow, random or recent picture at your sidebar
  • Language support : Translated in more than 30 languages
  • Translation downloader : Download with one click the new translation file
  • Upload tab integration : You have access to all pictures via the upload tab
  • Tag support for images : Append related images to your post, create a image tag-cloud
  • Meta data support : Import EXIF, IPTC or XMP meta data
  • Sort images feature
  • Support for XML Sitemaps : Add Images to your sitemaps with the WordPress SEO by Yoast plugin

How to Install

1) Log into your WordPress dashboard. 

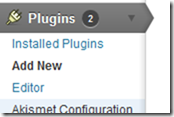
2) Go to Plugins->Add New

image

3) Type “NextGen Gallery” into the search box and click “Search Plugins”

image

4) “NextGen Gallery” by Alex Rabe should be the first item.  The search results may change, so make sure you are installing the right thing. 

image

5) Click on “Install Now” and click “OK” on the confirmation screen:

image

6) Click “Activate Plugin”

image

7) Now the NextGen Gallery WordPress plugin should be installed, activated, and ready to go…

image


How to Use

There are many ways to use this plugin.  I’m going to show you how I created a gallery and used a short code to insert it into a post.

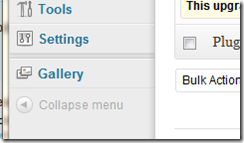
1) Go to the new “Gallery” section on your wordpress menu:

image

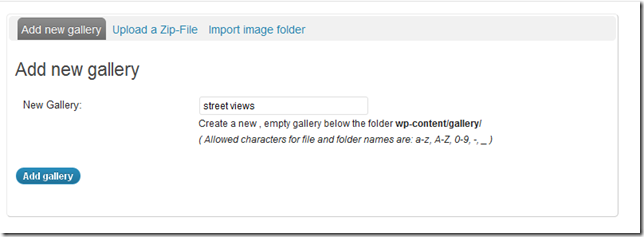
2) Click Add Gallery/Images

3) Give the Gallery a name.  (For this example, I have 9 pictures of street views that I have taken.  So I am calling it “street views”)

image

4) Click “Add Gallery”

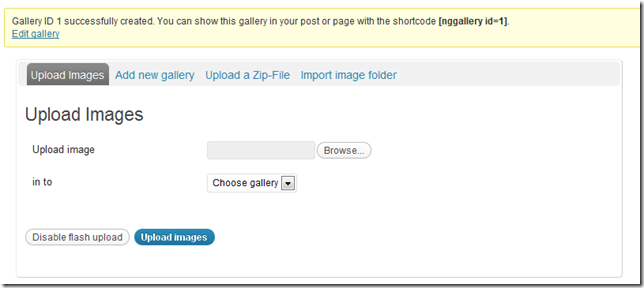
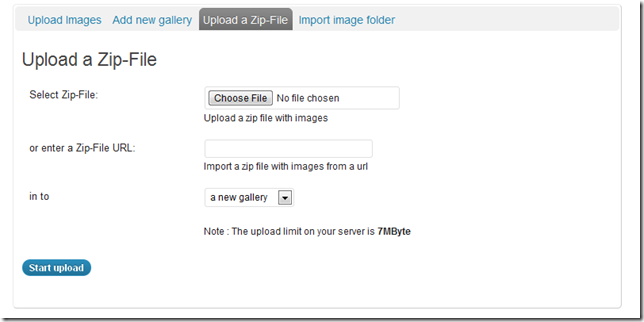
5) Now it is time to upload the pictures.  You can choose to upload pictures individually, or you can zip them up and upload one zip file.  There are several options available here, and I recommend exploring them all.  For this example, I am going to use the Upload a Zip-File. 

image

image

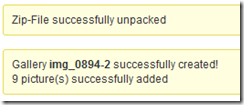
6) Click on “Upload a Zip-File”.  Click “choose file” and then click start Upload.

image

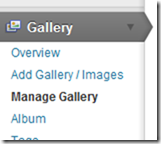
7) Now let’s view the Gallery.  Click on Manage Gallery. And Click on Street views

image

image

8) Here you can see all the pictures in the gallery.  Make adjustments such as rotating, caption, name, tags, exclude pictures, sort, etc.

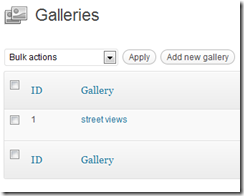
9) Now let us insert this gallery into the post.  For this, we need to know the Gallery Id.  Which we can see in the list of Galleries.  This one is ID 1.  Type the short code below to insert this gallery.

image

Here is the results:

[nggallery id=1]

There are many, many more features that I did not cover.  But this makes it very simple to add photoslide shows any place you want on your wordpress site.

If there are favorite features you use of this plugin, please leave a comment.  Also, if there are other plugins that you would recommend then leave a comment about that as well.
Ideas from ArabicPod.net fro ISpeakHindi.com

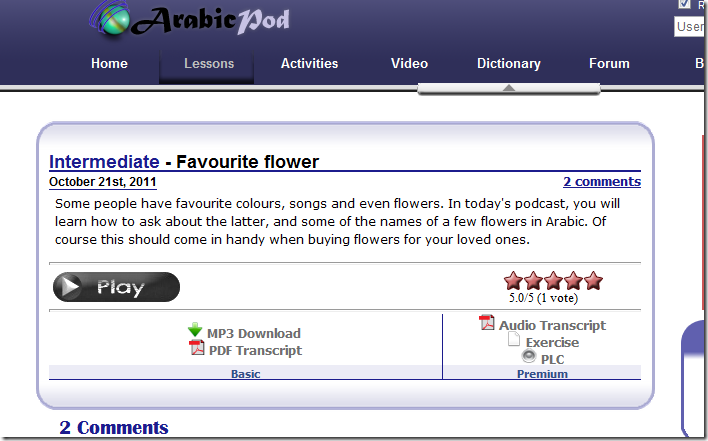
I’ve been running the ISpeakHindi.com – Learn Hindi site for over 4 years now.  I am constantly on the look out for ideas to incorporate.  I have quite a list, probably enough to keep going for a long time.  But today I get an email from ArabicPod announcing that they have a new lesson: #432 Favorite Flower:

image

Clicking on the link takes you to the lesson on the site:

image

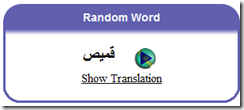
You can not do anything other than vote on the lesson without signing up.  Also, they have a random word on the right:

image

This would be an easy thing to do on ISpeakHindi.com to add a random word to the right.  It would be a good compliment to the master 4 Hindi words a day tool.   I was thinking of adding a random vocabulary question to the side as well.  Also, maybe other languages exercises as well.

Also from the list of lessons page: www.arabicpod.net/learnarabic/Intermediate there is this link:

image

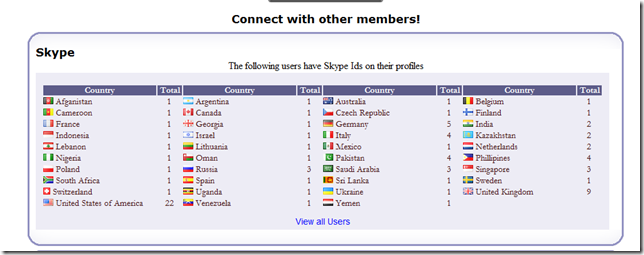
Clicking on that gives you a list of countries and people that have Skype Ids:

www.arabicpod.net/communicate

image

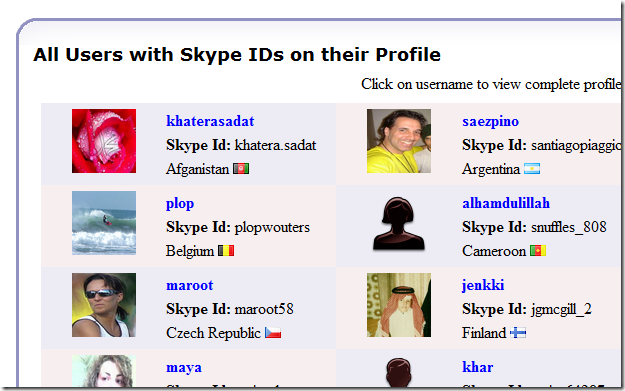
Clicking on “View all Users” gives:

image

The one improvement would be if it could show their Skype status.  But I think this is only possible if the person allows for you to be on their friends list. 

Ideas that I want to implement:

  1. Add random word to the left side
  2. Add random vocabulary quiz
  3. Add random question quiz (take the questions associated with the lessons and allow for people to answer them.  It can direct them to the episode with the answer.)
  4. Add “Skype ID” to user’s profile
  5. Add a view that will let visitors see members based upon the presence of the SkypID.

Nurturing Leads

Email from Clate Mask, CEO of Inusionsoft, points out “it takes seven touches before a lead is ready to buy”. 

What is a touch?  Any type of contact including an email, instant message, phone call, mailing, directed tweet, directed Facebook message, or inLink mail.

How to touch without offending?  Clate suggests “putting yourself in your prospects’ shoes to determine what’s important to them. Then create content that educates and builds trust. Using this content, you can create campaigns that move prospects progressively towards the sale.”

Ask yourself why you got that first touch?  If you are a language learning site like ISpeakHindi.com then that first touch could be for a variety of reasons.  If the person is going to India in a few weeksand wants to learn just a few basic phrases, then it is a matter of giving them those phrases and information to help immediately to help with the trip.  The interaction with these people will be different than the husband that has married a Hindi speaker and has no immediate needs but a long term interest.  With the first, it must be an intense, focused interaction.  With the later, it will be a more diffused, long term interaction.

If you are a home inspector like Texas Certified Home Inspection then you could be a home owner wanting to get the home inspected in preparation of selling.  Or perhaps you are a home buyer wanting to get a home inspector.  These people want immediate information, and will probably want to be left alone after completing the sell.  However, some of the people looking for a home inspector might be real estate agents and will want to develop a longer term relationship.  Or perhaps a home owner interested in tips on maintaining a home.  These lend themselves to a longer more involved relationship.

But lets say you are an online woman’s magazine like Woman’s In Site.    A sale looks very different than for the home inspector.  A sale would be a repeat visit, more page views, signing up for the email list.  At least that would be the public sale.  The other side would be potential advertisers who see value in the audience and in the brand.

The key to getting that sale is to maintain contact through multiple “touches”.  The key to touches being welcomed verses avoided is to understand the context of the initial touch.  How to do that is the key.

What options do you have available?  First, where did the touch come from?  If it came from another website, that might provide clues.  What was the first part of your site that they accessed?  Where did they go next?  There are tools that will help you determine this.  Google is constantly doing this by tailoring their Ad Words based upon the content of the site and the information it gathers about the user.

Another option is to ask.  “How can I help you?”  “What are you looking for?”  “Why are you here?” can be answered through a survey.

Know why people are coming to your site.  Know which ones would welcome further contact and which ones would rather you left them alone.  And may you have the wisdom to know the difference.

WP Plugin: Contact Form 7

wordpress.org/extend/plugins/contact-form-7/

Installation:

Step 1:  Dashboard->Plugins->Add New

image

Step 2: Search for “Contact Form 7”.  Should be the first result

image

Step 3: Click “Install Now” and click “OK” in the dialog confirming this choice:

image

Step 4:  Click “Activate Plugin”

image


Configuration

Step 1: Click on the newly added “Contact” area on the left navigation bar:

image

Here you can create a form to be displayed on your site.  It provides a default form that will be useful in 99% of the time.  

At the top it has the code that you need to put on the page or post that you want the contact form to appear.  Just copy and paste this code:

image

Now go to the page that you want to add the contact form.  I have created a page with the title “Contact Us” for this purpose.

image

image

image

Now just paste the code from the contact form here:

image

Click the “Update” button and then view the form on your site:

image

When you fill it out and submit it, it will be sent to the email address listed in the “contact” settings page where we had copied the code from.

image

After clicking send a little message appears:

image

And sure enough, an email appears in my inbox:

image

Customization

My first use for this contact form is for a home inspector.  What are some things that a home inspector would like to know?  How about phone number and address of the home to be inspected.  Also, it doesn’t make sense to have the customer put a subject, so we will remove this.

Go back to your admin screen and go to Contact:

image

Look for the place where the form is defined:

image

The first step is to remove the “Subject”:

<p>Subject<br />
    [text your-subject] </p>


Should look like this now:

image

Let’s go ahead and add a place for phone number just below email address:

Step 1:  Click on the blank line above the “Your Message” line.

Step 2:  Click on the “Generate Tag” button on the right and select “Text field” on the list that is displayed:

image

Step 3: Fill out the attributes of this new field.  It starts out with some default values like this:

image

Let’s make these changes:

Required Field: <checked>

Name: Phone-Number

Once you make these changes, it will look like this:

image

Now, copy and paste the codes indicated to the right places, and add some formatting codes.  I would make the top part look like this:

image

And make the bottom look like this:

image

Now let’s add the property address and not make it a required field.  This can be done by change the form code to look like this:

image

Change the email part to look like this:

image

Scroll back up to the top and click “save”

Go to the front of the site and see the results:

image

Give it a test:

image

Worked as expected:

image

TinyMCE Advance WordPress Plugin

Did you ever want to make changes to the editor window in WordPress?  Then the TinyMCE Advance WordPress Plugin is for you!

When you first start WordPress, the editor window provides very minimal options:

image

(The “ABC” with the checkmark was added by the After The Deadline plugin which provides proofreading support.  And the last item was added by the WP-Tables Reloaded Plugin)

Clicking on the expand icon:

image

will reveal another row of options:

image

The TinyMCE Advance WordPress Plugin will add an option under “settings” for “TinyMCE Advanced”.  This will allow for you to completely alter this and to add many, many more options:

image

I’ve added the Table set of functions.  I found that it did not work when I had WP-Table Reloaded installed.  But when I deactivated WP-Table Reloaded it worked fine.

image


And now when I enter a new post here are the options I have:

image

Magazine Themes to Use for Woman’s Insite


Best Free Magazine WordPress Themes

Arthemia Free Theme (Premium Version Also Available)

Source | Download | Demo | Premium Version of Arthemia


Mimbo Theme

mimbo3

Source | Download | Demo


Morning After Theme

Morning After Theme

Source | Download | Demo


Small Magazine Theme

Source | Download | (Unable to Locate a Demo)


Premium News Theme

Source | Download | Demo

ZinePress WordPress Magazine theme

zinepress-wordpress-theme

Live Demo | Download


The Web News

the-web-news-theme

Live Demo | Download

WP-Plugin: Slick Social Share Buttons [Recommended]

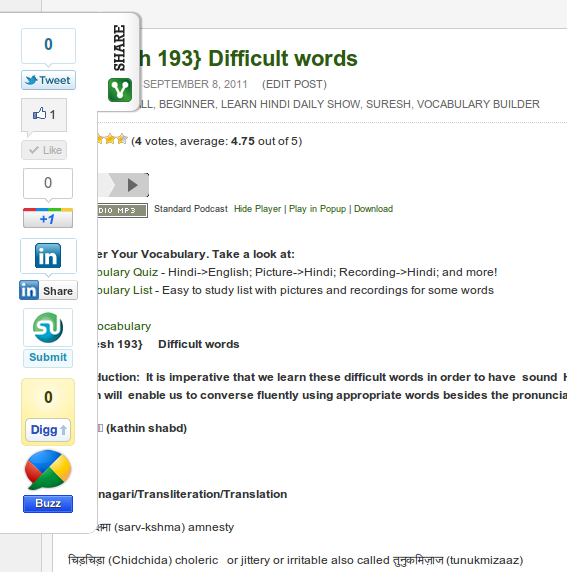
The Slick Social Share Buttons is my recommended solution for adding the “Tweet”, “Like”, +1, stubleupon, digg, InShare, and Google Buzz links to your WordPress site.  I installed it on ISpeakHindi.com, and had it looking good with my theme in less than 3 minutes.  Here is how it looks in it initial state:

This is the activated state:

Slick isn’t it?

There are many different options on where to put it.  By default it floats as a “share” button in the upper right of the screen.  I changed the type from “floating” to “Slide out”.  The Location to “Left”.  And increased the offset to 200px.

You can also control where on your WordPress site it shows up.  For me, I think it only makes sense to show it on “posts” since I want to encourage sharing of individual lessons to get some deep links into my site propagated into the social spheres.  But you can also have it for the “home page”, pages, “category pages” and “archive pages”.  You also have control on which social services to show and options on how they are displayed.

I initially had trouble with the “Facebook Like” button.  I would click it, the number of “likes” would increment, the facebook like comment box would display.  And within a second, the box would disappear and the number of likes went back to zero.  I found that when I changed the “Facebook” option from “xfbml” to “iFrame” I no longer had this problem.

Convinced?  Log into your WordPress dashboard.  Go to Plugins->Add New.  Then search for “Slick Social Buttons”.  It should be the first one that comes up.  If you get multiple results look for the one by Lee Chestnutt..

You use a different social share plugin for WordPress?  Leave me a comment that includes the name of the plugin, the site you use it on, and why you like it.