Follow Me Game – Arduino Based Game

Remember playing MySimon (Simon Says) back in the 1980s?  It was a simple game that could entertain you for hours.  It had 4 buttons, each of a different color.  Turn on the game, and one of the buttons would glow.  Then you had to press that button.  Another button was added to the pattern, and the goal was to get to the longest pattern without messing up.
Here I show a simple Arduino based version of this game.  It is simpler because there are only 3 buttons, but it is completely open for you to build on and learn from.


image

See the circuit and files on Fritzing.org


Update:  I received an email about a more sophisticated version of Simon.


Arduino SimonGame

More infos at jadiema.blogspot.com/
Arduino Simon Game: Version 3
Initial Release from David M. Auld (19th October 2009): Version 1 & 2
www.dave-auld.net/index.php?option=com_content&view=article&id=96:arduino-project-simon-game&catid=54:arduino-projects&Itemid=107
Added some features by jadiema: Version 3:
NEW: Added EEPROM storage for high score: level and name
NEW: Multilangage selection
You’ll find the code at: code.google.com/p/my-arduino-projects/downloads/detail?name=Arduino_SimonGame_EEPROM_LANGUE_V3_1.pde&can=2&q=#makechanges

Simple Scoreboard using the Arduino processor

The Arduino microcontroller board has got to be one of the coolest things to come along.  If you ever wanted to create simple gadgets and devices without that much hassle, then this the board to get.  You can hook it up to your computer using the USB port, program in a simple C language, download the code, and away you go.  You can use it to create controllers for your games, lights for your Christomas tree, loggers for your garden, monitors for your rooms, and controllers for your robots.  All you need is a little patience and imagination (access to Google helps too 🙂 ).

Today, I want to share with you a little project that we created.  It is a simple scoreboard.  It took us about 20 minutes to put together, but that is because we were just learning and didn’t know much. 

We started out by finding this example on how the LCD panel works: www.arduino.cc/en/Tutorial/LiquidCrystal 

Then we hooked up some buttons, added some variables, created several iterations between our code.

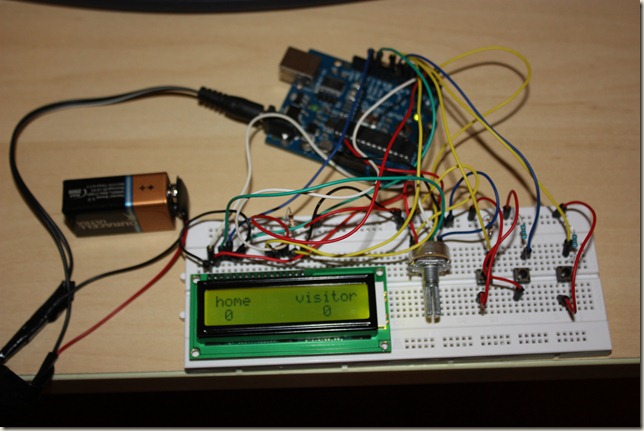
Start off displaying the “Hello World” message in the LCD example.  Then had added a “homeScore” variable and displayed that.  Then added the Home Button.  And tested to see if it was “high”, i.e. “on” in our code.  Our first version of the code did not have the “delay” commands, and pressing the button one time caused the score to increment by 50-120 points.  This was because the loop would have that many cycles before the button was brought back “low”, i.e. “off”.  Adding the “delay” kept this from happening.  Then did the same thing for the visitor button.  Required some experimentation with the lcd.SetCursor command to get the visitor scores to show up in the right place.  Then added the reset button and set the scores to 0 when it was pressed.  Ran into the problem that if the score had become two digit, then the 0 was only over writing part of the digits.  Decided to “clear” the display completely on reset, which resolved the problem.  Then cleaned up the code a little, and this was the results:


IMG_8725

image

Code (based on LCD example: www.arduino.cc/en/Tutorial/LiquidCrystal )

/*
Simple Scoreboard

Shows a simple Home/Visitor scoreboard

*/

// include the library code:
#include <LiquidCrystal.h>

// initialize the library with the numbers of the interface pins
LiquidCrystal lcd(12, 11, 5, 4, 3, 2);

int homeScore;
int visitorScore;
const int buttonHomePin = 6;
const int buttonVisitorPin = 7;
const int buttonResetPin = 8;
int buttonState = 0;

void setup() {
  // set up the LCD’s number of columns and rows:
  lcd.begin(16, 2);
  // Print a message to the LCD.
  setupScreen(); 
}

void setupScreen()
{
  lcd.clear();
  lcd.setCursor(0,0);
  lcd.print("home     visitor");
  homeScore = 0;
  visitorScore = 0;
}

void loop() {
  buttonState = digitalRead(buttonHomePin);
  if(buttonState == HIGH)
  {
    homeScore++;
    delay(500);
  }
    buttonState = digitalRead(buttonVisitorPin);
  if(buttonState == HIGH)
  {
    visitorScore++;
    delay(500);
  }

   buttonState = digitalRead(buttonResetPin);
  if(buttonState == HIGH)
  {
    setupScreen();
  }
   lcd.print(homeScore);
   lcd.setCursor(12, 1);
   lcd.print(visitorScore);
}

First Two Weeks of Summer

“Can’t talk now… I’m on a schedule.”  “No, I have no time to meet this week.”  “Really focused, can’t think about that right now.”  If you have talked to me in the past two weeks, you have probably heard something like that.  Also, you may have noticed that I have been a little slow on emails, not attending events that I normally go to (like the cypress coffee club networking meeting and the CyFair Chamber meetings or the Friday night chess meets, toastmasters, etc.)  You may have noticed that the daily learn Hindi show on ISpeakHindi.com has been a little less than daily.  And you might be tempted to ask “Are you OK?”  or perhaps you think I am working on some super secret project.  Well, it is time that I set the record straight.

These past two weeks I have been engaged in something that is best described as “continuous contact parenting”.  In past summers we have sent the kinds off to various camps.  But this summer I am at home and available to spend with them 24/7.  I want to make the most of this time.   Because I know that in less than a decade both of them will out of the house, and I will probably have time for them at that point, but they will probably be too busy with their lives for me.

But how to make the most of the summer?  Should I just sit around and do whatever comes to mind.  Should we just play board game after board game.  Read books.  Watch movies.  What should we do?

I had some very specific ideas on what an ideal summer day might look like.  It should have exercise.  Time for eating.  Piano practice.  Math worksheets.  Piano writing.  But there is one area that I thought we could focus on and have a lot of fun:  Electronics and robotics.  After putting all that together, we came up with a daily schedule that we would try for two weeks:

image

The electronics time was spent learning about voltage, current, resistance, using the multi-meter, understanding the relationship between voltage, current, resistance, soldering, striping wires, reading circuit diagrams, making connections between components on a breadboard, using a Parallax Basic stamp.

Here are some pictures to give you some idea:
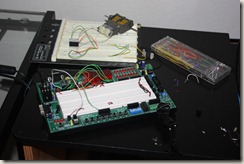
IMG_8710

We also put together some kits:

IMG_8708

In fact, we have a “wall of completed projects” where we put a postcard or something to indicate the projects that we have finished:
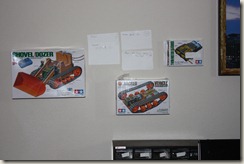
IMG_8709

We have also programmed Parallax’s scribbler robot. 
 

IMG_8706

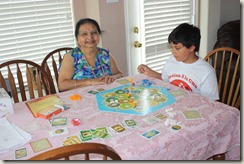
During our free time we did end up playing a board game, Settlers of Catan.  My friend, Daniel Parker, in Austin introduced it to us a couple of weeks ago.  Since then we have played dozens of games.
IMG_8671

This is just a small glimpse of the things we have been up to.